 Pin this
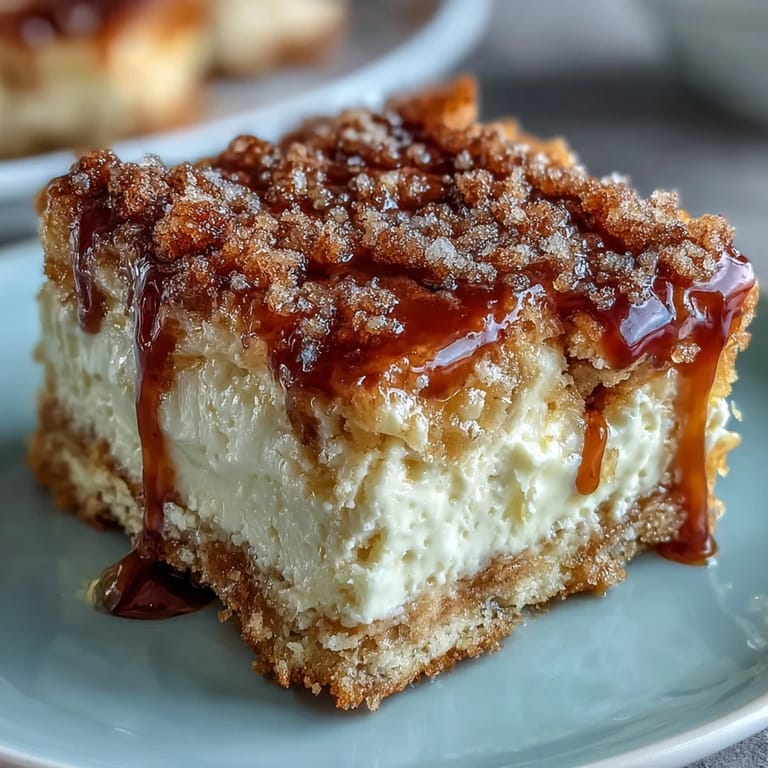
 The first time cinnamon filled the house from these Sopapilla Cheesecake Bars, I wasn't actually trying to impress anyone—it was just a rainy Tuesday and I needed a little kitchen fun. The buttery layers and the crackle of sugary topping took me by surprise: honestly, I stopped everything to just breathe in the sweet, heady scent. Some desserts announce themselves with a grand reveal, but this one almost sneaks up on you, humble out of the oven yet outrageously good. There’s something about pulling these bars apart with your hands that feels both celebratory and impossibly simple, the sort of treat that begs to be shared. One bite and I knew my standard potluck offerings would never be the same.
I once brought a pan of these to a Cinco de Mayo backyard dinner, arriving flustered after a wild parade detour, yet the bars disappeared before the tacos were even half gone. There was an impromptu chorus of ‘who made this’ that I’ll never forget, and more than one person insisted I text them the recipe on the spot (cinnamon-sugar dusting and all). Mixing the cheesecake filling while everyone swapped stories nearby made the whole place feel like home, even for new faces. It’s a dish that breaks the ice in the most delicious way. Someone licked the crumbs from the pan—a sure sign you’ll never have leftovers.
Ingredients
- Refrigerated crescent roll dough: The crowning hack—flaky and foolproof, just unroll gently and press; colder dough is less sticky and tears less.
- Cream cheese: Let it come to room temp for dreamy smooth filling, and trust me, full fat delivers the richest flavor.
- Granulated sugar: White sugar brings consistent sweetness; I like to sift out any lumps before using for easy blending.
- Vanilla extract: Choose pure vanilla if possible—those fragrant notes make the filling taste like bakery magic.
- Unsalted butter: Melted butter forms the glossy base for the cinnamon sugar crust; use fresh for best aroma.
- Ground cinnamon: The soul of these bars—fragrant and spicy, a little goes a long way, so sprinkle with a steady hand.
Tired of Takeout? 🥡
Get 10 meals you can make faster than delivery arrives. Seriously.
One email. No spam. Unsubscribe anytime.
Instructions
- Warm up the oven:
- Set your oven to 350°F (175°C) and let it preheat while you gather the ingredients. Grab your trusty 9x13 pan and give it a light grease so nothing sticks and cleanup is a breeze.
- Press in the first dough layer:
- Unroll the first can of crescent dough and gently press it across the pan’s bottom. Listen for that quiet hiss as it meets the metal—it’s okay if there are seams; just pinch them closed for a smooth base.
- Whip the cheesecake filling:
- In a medium bowl, blend softened cream cheese, 1 cup sugar, and vanilla extract until you get a glossy, fluffy mixture. It should glide off a spoon without lumps and smell almost like vanilla frosting.
- Layer on the creamy center:
- Spoon and spread the filling evenly over the dough layer, reaching into every corner so there are no cheesecake-less bites. Use a rubber spatula—it makes getting the last bit easy (and sneaking a taste even easier).
- Add the top dough layer:
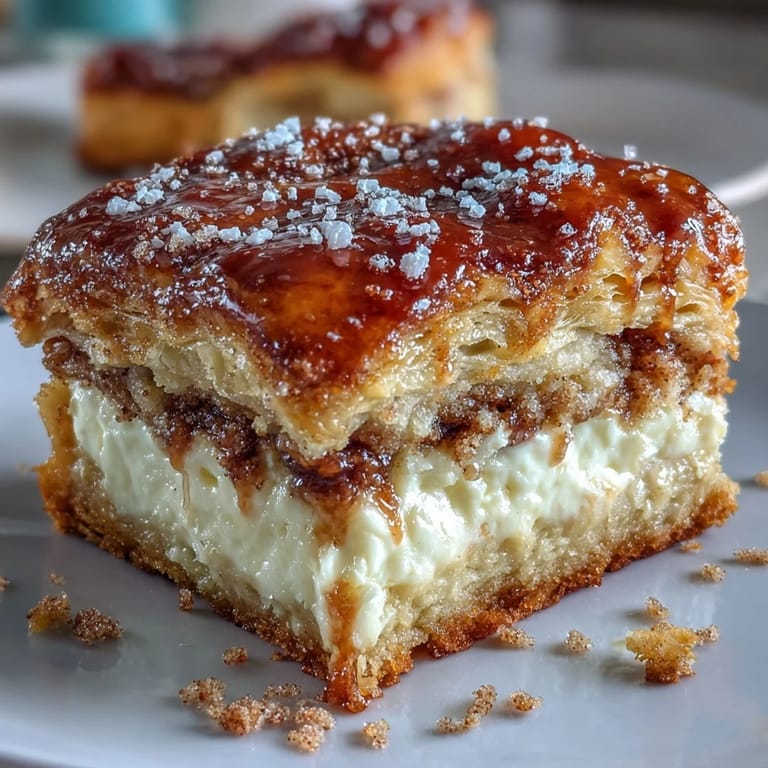
- Unroll the second crescent dough can and drape it over, patching gently where needed so the cream cheese is completely tucked in. Don’t fret if it’s not perfect—rustic is part of the charm.
- Pour on the buttery goodness:
- Spoon or brush melted butter evenly across the top—it’ll soak in, giving a golden sheen. This is the messy-fun part, don’t worry if it drips down the sides.
- Sprinkle cinnamon sugar on top:
- Mix together 1/3 cup sugar with cinnamon and shower it over the buttered dough. Try to get a good, even layer so every bar has some of that caramelized crackle.
- Bake to golden perfection:
- Slide the pan onto a middle oven rack and bake 28–32 minutes, watching for the top to puff and turn golden brown around the edges. The kitchen will smell like a bakery—don’t be tempted to cut in too soon!
- Cool and slice:
- Let the bars rest at least 30 minutes so the filling can set; they’ll slice neatly and hold their shape. Serve them warm for gooey filling or chill for clean, creamy bites—both are amazing.
 Pin this
  Pin this
 When my neighbor’s daughter turned eight, her mom asked me to bring something sweet ‘that the kids will actually eat.’ I brought a pan of these and within minutes, sticky-fingered kids were racing around, parents sneaking samples behind coffee mugs, and one little voice announced they had to have ‘the magic cheesecake squares’ for every birthday from now on. Seeing a dessert bring such easy joy—to adults and kids alike—made me feel these bars were invited to all our future parties. Sometimes all it takes is a sprinkle of cinnamon and a sturdy baking pan to turn simple ingredients into something people remember. That’s the real magic of home baking.
Making It Your Own Every Time
Experimenting with the filling is half the fun: I’ve stirred in lemon zest for a burst of freshness or even swapped half the cream cheese for ricotta for a lighter touch. For a subtle twist, you can blend in a splash of almond extract or a spoonful of orange marmalade. Fruity toppings—like mixing a layer of jam beneath the top dough—take these bars in a welcome, summery direction. Spreading the filling evenly makes sure every bite is as creamy as the last. Don’t be afraid to personalize the recipe based on whatever cravings (or random fridge finds) pop up.
Serving: Hot, Cold, or With a Twist
I’ve discovered these bars have a split fan club: some people wait impatiently for them to cool, savoring that cake-like neatness, while others dive into warm, gooey squares that are almost impossible to resist. Serving them at room temperature is perfect for potlucks when you need make-ahead dessert with no fuss. If you’re feeling festive, top each bar with a dollop of lightly whipped cream or even a few fresh berries—it instantly turns an everyday traybake into celebration fare. If you like a crunchy contrast, a handful of toasted slivered almonds sprinkled before baking does the trick. Little upgrades can really make this recipe your signature.
Quick Clean-Up and Storage Smarts
The easiest way to keep your pan spotless is to line it with parchment or foil, leaving overhang so you can lift the whole batch out for slicing. Once cooled, the bars stack well in an airtight container and last for three days—if they survive that long! Chilling them firms up the layers, making them perfect lunchbox treats or quick snacks on the run.
- If you want crisp edges, pop the bars under the broiler for the last minute, but watch closely.
- Freeze unbaked bars for up to a month; thaw and bake fresh.
- Sneak a test bar for yourself before serving—they tend to vanish fast.
 Pin this
 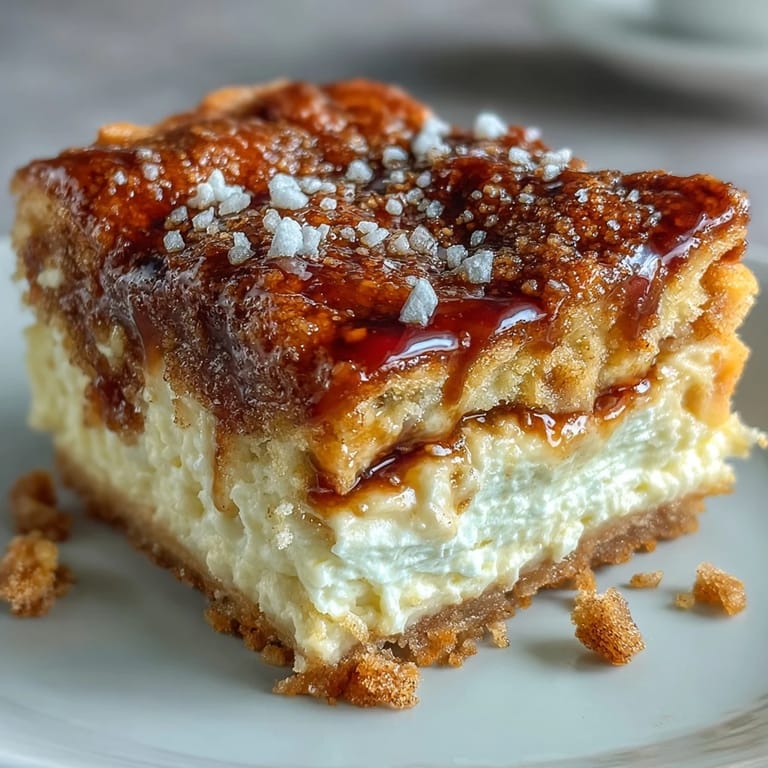 Pin this
 Whether you’re baking for a party or just to brighten up a slow day, these Sopapilla Cheesecake Bars bring cheerful celebration to your kitchen. Don’t be surprised if you’re asked to make them again before the week’s out.
Recipe FAQs
- → How can I prevent a soggy bottom?
Press the first dough layer firmly and evenly into the pan and blot any excess moisture from the cream cheese mixture. Bake on the middle rack so heat circulates evenly and the bottom can crisp without overbrowning the top.
- → Can I use low-fat cream cheese?
Yes. Low-fat cream cheese works, though the filling will be slightly less rich and may be a touch softer when cooled. Chill the filling briefly before spreading to help maintain structure.
- → How do I know when the center is done?
Look for a lightly golden top and a center that no longer jiggles like batter. A gentle press should feel set; the bars will firm more as they cool, so avoid overbaking to keep them tender.
- → Can I make these ahead of time?
Yes. Bake and cool completely, then cover and refrigerate for up to 3 days. Bring to room temperature or warm briefly before serving for a softer texture.
- → Is freezing an option?
Freeze cooled, sliced bars in a single layer on a tray, then transfer to an airtight container for up to 2 months. Thaw in the refrigerator overnight and warm gently before serving if desired.
- → What flavor variations work well?
Stir a teaspoon of lemon zest into the filling for brightness, spread a thin layer of fruit preserves under the top dough for jammy notes, or serve with fresh berries and a drizzle of honey for contrast.