 Pin this
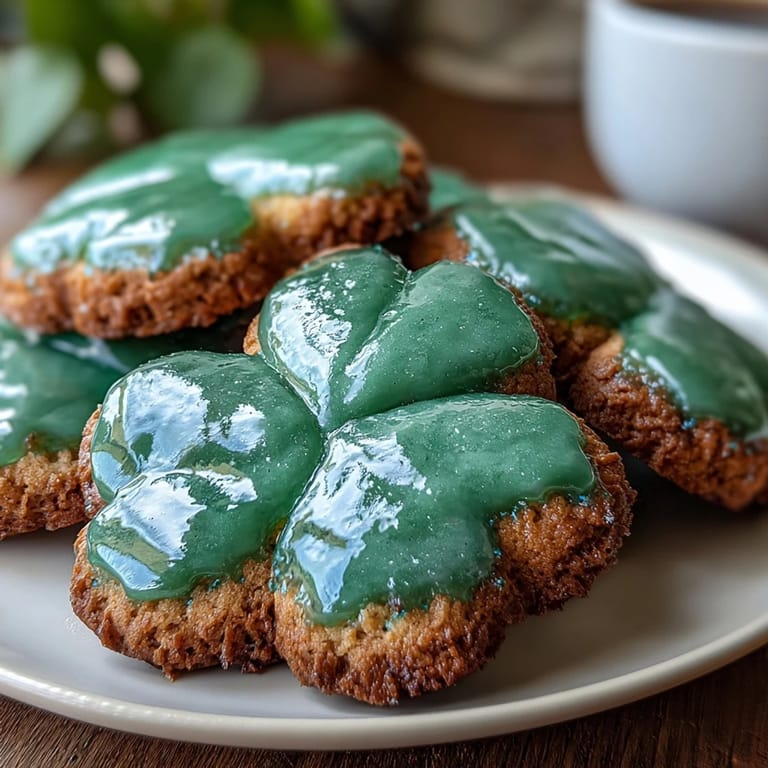
 My kitchen smelled like butter and vanilla the afternoon my neighbor knocked on the door with a shamrock cookie cutter she'd found at an estate sale. We'd never baked together before, but something about that little green tool felt like an invitation. Within an hour, we had dough chilling in the fridge and a plan to turn those buttery rounds into something festive enough for her St. Patrick's Day party. What started as a casual kitchen moment became the recipe I've made every March since, each batch a small ritual of anticipation and color.
I'll never forget the look on my daughter's face when she bit into one of these cookies for the first time—her eyes went wide like she'd discovered treasure. The buttery base gave way to that snap of icing, and she immediately asked if we could make a double batch the next week. Now she's the one requesting them before St. Patrick's Day even shows up on the calendar, which tells me everything I need to know about whether this recipe works.
Ingredients
- All-purpose flour (2 1/2 cups): The backbone of tender cookies; measure by spooning into your cup rather than scooping directly from the bag, which compacts the flour and makes your cookies tough.
- Unsalted butter (3/4 cup, softened): Softening it to room temperature is non-negotiable; cold butter won't cream properly and you'll end up with dense, sad cookies instead of light ones.
- Granulated sugar (1 cup): This is what makes the cookies crispy at the edges and tender inside; don't swap it out for brown sugar or your whole texture changes.
- Large egg: Room temperature eggs blend into the dough more smoothly, so pull yours out of the fridge while you're prepping everything else.
- Vanilla extract and almond extract (1 teaspoon vanilla, 1/2 teaspoon almond): The almond extract is optional but it adds a whisper of something sophisticated that elevates plain sugar cookies into something memorable.
- Baking powder (1/2 teaspoon): Just enough to give the cookies a subtle lift without making them cakey; this isn't a science fair experiment, it's a gentle touch.
- Salt (1/4 teaspoon): It doesn't make the cookies salty; it makes everything else taste more like itself.
- Powdered sugar (2 cups, sifted): Sifting matters here because lumps will ruin your icing's smooth finish; I learned this the hard way by spending ten minutes with a fork trying to break up clumps.
- Meringue powder (2 tablespoons): This is what gives the royal icing its glossy strength; it's usually found in the baking aisle and it's worth seeking out instead of substituting.
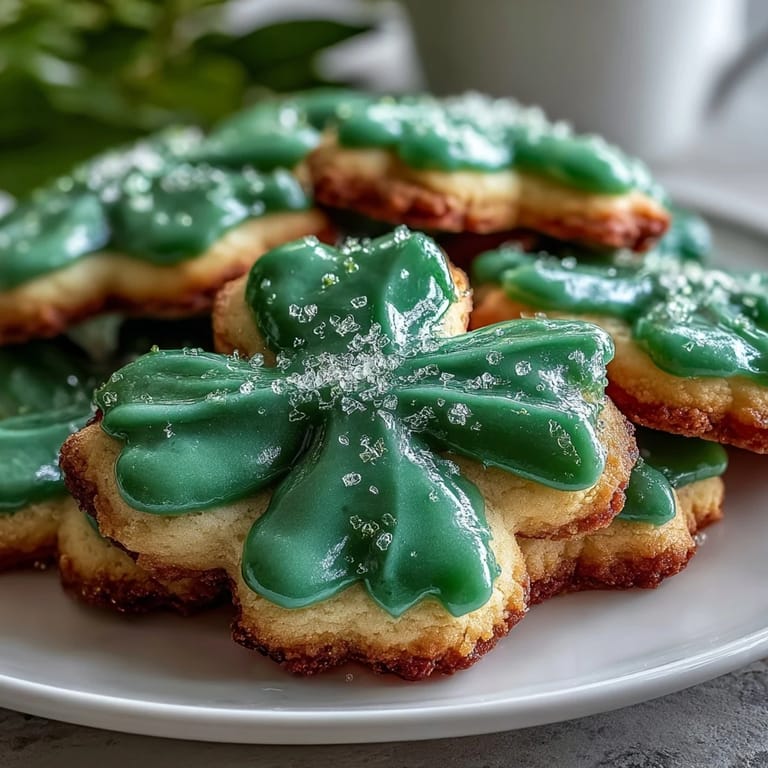
- Green gel food coloring: Gel coloring is more concentrated than liquid, so you won't end up with cookies that taste faintly of food coloring, which is absolutely crucial.
Tired of Takeout? 🥡
Get 10 meals you can make faster than delivery arrives. Seriously.
One email. No spam. Unsubscribe anytime.
Instructions
- Mix your dry ingredients and set them aside:
- In a medium bowl, whisk together flour, baking powder, and salt so they're evenly distributed. This step prevents you from getting pockets of dry flour when you fold everything together.
- Cream butter and sugar until it's light and fluffy:
- Beat them together for a full two minutes; you're looking for a pale, whipped texture that's almost cloud-like. This step incorporates air and is what makes these cookies tender instead of dense.
- Add the egg and extracts:
- Beat in the egg, vanilla, and almond extract until everything is combined and smooth. The dough should look glossy and cohesive at this point.
- Fold in the dry ingredients gently:
- Add the flour mixture gradually and mix just until the dough comes together; overmixing develops gluten and makes cookies tough. You're looking for a soft dough that holds together when you squeeze it.
- Chill the dough:
- Divide the dough into two discs, wrap each in plastic wrap, and refrigerate for at least one hour. Cold dough holds its shape when you cut and bake it, which means your shamrocks stay shamrock-shaped instead of spreading into blobs.
- Preheat and prepare:
- Set your oven to 350°F (175°C) and line your baking sheets with parchment paper. This prevents sticking and ensures even browning on the bottom of your cookies.
- Roll and cut your cookies:
- On a lightly floured surface, roll dough to 1/4-inch thickness; too thin and they'll be crispy, too thick and the icing won't look proportional. Use your shamrock cutter and place cookies one inch apart on the sheets.
- Bake until golden at the edges:
- Bake for 8–10 minutes, watching for the edges to just begin turning golden; the centers will look barely set. They'll continue cooking slightly on the hot pan, so resist the urge to bake them longer or they'll become hard.
- Cool strategically:
- Let cookies rest on the baking sheet for five minutes so they firm up, then transfer to a wire rack to cool completely. This prevents them from breaking when you move them and ensures the icing will stick properly.
- Make your royal icing:
- Combine powdered sugar and meringue powder, add water and vanilla, then beat on low speed for 5–7 minutes until it's smooth and glossy. The meringue powder is what gives this icing its strength and shine.
- Color your icing:
- Add green gel food coloring a tiny bit at a time, stirring between additions until you reach your desired shade. Gel coloring is intense, so start with less than you think you'll need.
- Pipe and flood:
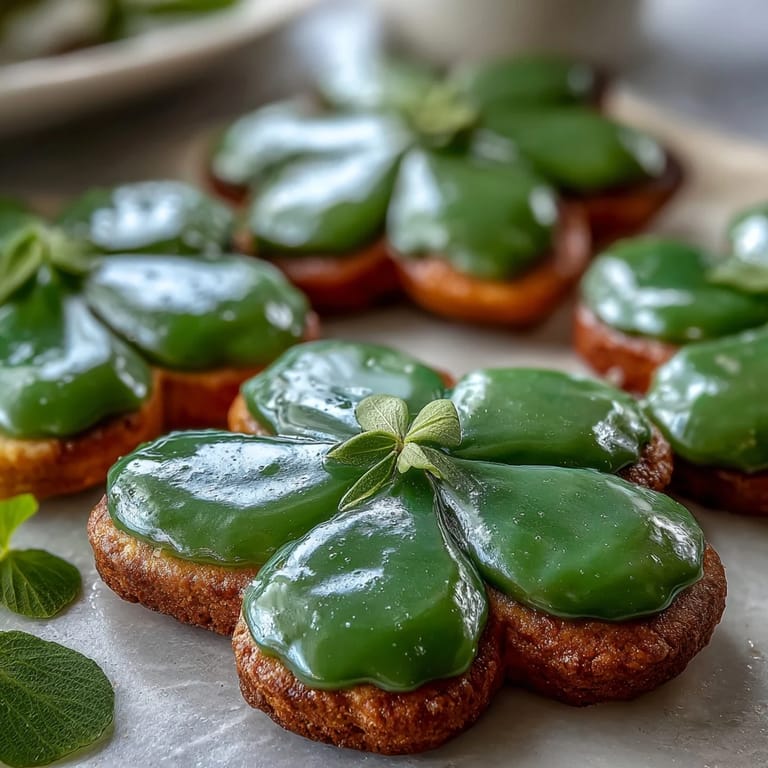
- Transfer icing to a piping bag with a small round tip, outline each shamrock with a thin border, then flood the center. It takes practice to know how much water to add to your icing so it flows without running all over the cookie, but you'll figure it out by cookie number three.
- Let the icing set:
- Allow at least one hour for the icing to harden completely before stacking or serving; patience here prevents smudged cookies. If you're in a hurry, a cool room speeds this up more than heat does.
 Pin this
 There's something genuinely special about handing someone a box of these cookies and watching their face shift when they see that vibrant green against the pale butter cookie. It's such a simple thing, but somewhere between the cutting and the decorating, food becomes a small gesture of celebration, and that's when cooking stops being about timing and temperature and becomes about connection.
Storage and Keeping Them Fresh
Once the icing is completely set, store these cookies in an airtight container at room temperature where they'll keep for up to a week. I usually layer them with parchment paper between each layer to prevent the icing from sticking to the cookie below, which sounds silly until you're trying to peel hardened icing off a shamrock and it breaks. If you're really planning ahead, you can freeze the baked, un-iced cookies for up to three months, which means you could theoretically make the dough in February and decorate closer to the actual holiday.
Decorating Variations and Personal Flair
The plain green icing is beautiful on its own, but there's real joy in playing around with extras. I've piped white dots on top for texture, sprinkled edible gold glitter into the wet icing for something fancier, or added a tiny shamrock outline in white on top of the green. One year I made a batch with a lighter green base and piped darker green shamrock stems, which took about three more minutes per cookie but looked like actual art.
Adjustments for Your Preferences
If you like softer, chewier cookies, reduce the baking time by a minute so they come out with a slight underdoneness that sets as they cool. Conversely, if you prefer them crisp, bake the full ten minutes and you'll get that satisfying snap. The almond extract is entirely optional; if you skip it, the cookies are still delicious, just a touch more straightforward, like the difference between a vanilla milkshake and a vanilla milkshake with a hint of something you can't quite place.
- For extra softness, store finished cookies with a slice of bread in the container and replace the bread every other day.
- If your icing seems too stiff after piping a few cookies, add water one tiny drop at a time and you'll find your rhythm.
- Double the recipe if you're bringing these to a gathering; they disappear faster than you'd expect and everyone will wish you'd made more.
 Pin this
 These cookies have become my quiet tradition, the kind of thing that makes March feel intentional. There's something about making something festive with your hands that slows everything down and makes the holiday feel real in a way store-bought cookies never quite manage.
Recipe FAQs
- → What gives these cookies their green color?
The vibrant green shade comes from gel food coloring added to the royal icing, which provides a smooth, glossy finish.
- → Can I omit the almond extract?
Yes, almond extract is optional and can be left out if a simpler vanilla flavor is preferred or for nut allergies.
- → How do I achieve the perfect cookie texture?
Chilling the dough for at least one hour before baking helps the cookies maintain their shape and results in a tender, buttery texture.
- → What tools are essential for shaping these cookies?
A shamrock-shaped cookie cutter is key to achieving the festive design, along with a rolling pin and parchment-lined baking sheets.
- → How long should the icing set before serving?
Allow the royal icing to set for at least one hour at room temperature to ensure it is fully hardened and glossy.